August 27, 2012

Welcome Visitors!

Hello everyone coming over from Tales of a Domestic Diva!

Today I was a guest blogger over at Tales of a Domestic Diva! I shared my simple pom-pom creations. Theyre cheap and easy to make and great for quick and easy decor ideas! I wanted to share a couple of my finished products over here so you all visiting and regulars can see what you can create! To see instructions be sure to see my post on her blog today here!

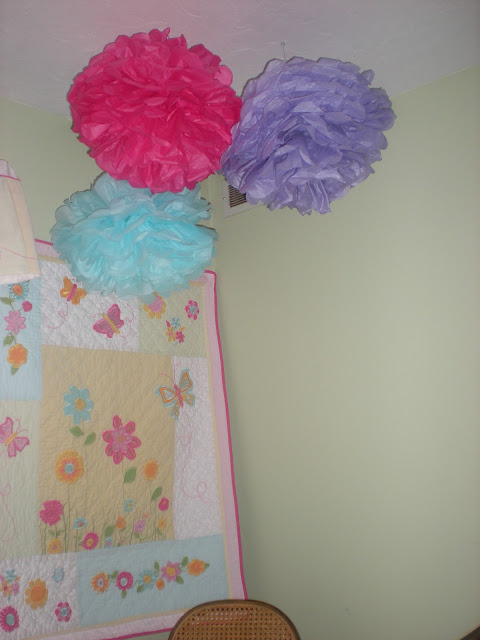
First up is the colourful pom-poms I made for my daughters nursery! They add a pop of colour to her room and bonus, only cost $3 to make!


For her birthday this year, as mentioned in the blog, I decorated with a couple pom-poms around the house, as well I made the owl pom-poms as shown in the blog! They made great cheap decor to go with the owl theme and everyone loved them!


So go check out the instructions and see how easy and cheap it is to make yourself! And thanks for all the guests for stopping by! Make sure to follow to see more project ideas!

August 19, 2012

Coconut Oil

A few days ago on Pinterest I saw a pin about getting soft silky hair and I had to check it out. I'm at a terrible stage post-pregnancy where my pregnancy-thick hair is now all fallen out and I have terrible regrowth going on. Its also super dry and breaking easy. I anxiously opened the pin to see what this miracle cure was!

Coconut oil! "Humm that's simple enough!" I thought. Stored it in my brain for my next grocery trip. This week I grabbed some from the store, $6.99 a bottle, not bad since it will last quite a few applications!


So here's what you do, open the bottle, flip your head upside down, then take a big handful and spread it through your hair. It kinda melts from the warmth of your hands so don't take too much you can always add more.  Work it through your hair and down to the tips (oh my poor tips needed it bad!). When your hair is coated take it into a pile and clip it on the top of your head.

Now you can do 1 of 2 things, put on a shower cap and put the hairdryer to it for about 15 minutes, or let it sit for 30 minutes. Since I had other stuff I had to get done (hey, I'm a mother, I'm always multi-tasking!) I decided to just let it sit while I finished folding my laundry ;)


After half hour, hope into the shower and wash like normal. I did read it could take 2 shampoos to really get it all out, this is what I had to do, then condition, dry & style as normal. 

Now my 1st day I wasn't so sure what to think. It was certainly nicer looking, smoother, my frizzys were MUCH better, but it was a little greasy looking. I had a busy day so I just threw it in a ponytail (as usual) and went on with my day.

Today I did my mom stuff in the morning and by lunch decided it was time to shower again! I just washed and  dried it and amazingly I didn't even NEED to straighten my hair, I'm usually a big puffy mess if I don't. I did straighten it some, but I was relieved to see I didn't NEED to!

Now brilliant me forgot to take before pictures, but trust me, there's a huge difference! Its so shinny and healthy looking! I'm sold!


August 6, 2012

Pom Pom decor!

Hey everyone! I've been working on some cute Pom Pom Decor I just had to share! Its a cute DIY project that is super cheap and easy to do which can easily brighten up any room or party!

I've done a couple projects now but my latest is for my daughter Lemon's 1st birthday party! My first project was to have some puff to hang up at the party as an easy and cheap decor option. 

All you need is: 

  • Tissue paper from the dollarstore 
  • Wire from the dollarstore (I use invisible, stretchy jewelry cord as I had some here from making necklaces) 
  • And a pair of scissors!
Now here comes the easy step by step guide ;) 

Lay out the tissue paper flat and begin from one end to the next folding like an accordion


Wrap a Floral Wire around it in the middle (This photo was before I used the invisible cord, I switched to that cause it was easier and worked better!)

Cut the top and the bottom in a half circle


Now, very gently and delicately separate each layer, they rip easily so be careful!

Fluff each later so it is round. Then I used a large needle and clear thread to go through the layers in the middle so I could hang it.


I don't have any photos from the party yet as it hasn't happened yet, but I will share the ones I made for her bedroom so you can see them in action! Then make sure you come by my blog to see the end result in a few days!!

 Using hooks installed in the ceiling I hung the pom poms up! And Voila! My Baby girl has an easily decorated room! Total cost for this project was under $5!


Now, while searching on Pinterest I also found an adorable way to make owl pom poms (her birthday theme is owls!). So I thought they would be super cute on her desert table. Again I don't have final pictures on the table as they party hasn't happened yet, so make her you drop by my blog for an updated picture!

Now for supplies you need

  • Tissue Paper from the dollarstore
  • Styrofoam Balls from the dollarstore
  • Floral Wire (again I used invisible jewelry cord I have left over)
  • Some felt (which I had left over from previous projects)
  • Scissors
  • And a glue gun!
Start out by cutting the tissue paper in half width wise so they're not too large. Set one aside, and then with the other begin to fold accordion style again and then put tie the cord around the middle tightly!


 Now cut the sides, this time I decided to try cutting into triangle shape instead of rounded


Then fan out the side and begin to slowly and carefully pull the pieces apart, again being super careful as they rip easily!


When the whole project is puffed up, find the middle and flatten them down so you have a flat spot for the head:


Now take a piece you set aside and  fold it in half, then place the Styrofoam ball in the middle and wrap it around the ball


(ack ignore my nailpolish! It needs to be fixed badly!)

Next take another piece you set aside and cut out some wings and ears. Then get the felt and cut out some eyes and a mouth!


Now all that's left to do is use your glue gun to put everything together!! Glue the head in place, then attach the wings & ears, then finally the face! and Voila! An owl center piece for the table!

Total cost for this project was about $4!


Hope everyone enjoyed reading this easy DIY project and has fun making your own! 

Sophie

August 3, 2012

Our Cleaning schedule


This is our family cleaning schedule. I created so I can add items later and sent it off to be laminated at Staples. Now I can use a dry erase marker to check them off as I go! Works great for staying on track! Download it here, modify it to fit your family and try it yourself!